


Beautifully encapsulate table related logic using a custom data source + sorting using directives
We use custom data source and directives to encapsulate the data manipulation logic for a table


Tables are a fundamental part of the web. It is used in most of the applications out there to present data in a readable and digestible way. Tables can come out as very simple components, but they can be a real pain to work with if things are not organized properly.
The problem
When the table we are dealing with has a lot of columns, rows, and multiple functionalities like sorting, filtering, etc, things can get real complex real fast.
If we are not very careful in architecting tables for our applications, there can be all sorts of issues that might come into the picture as we start developing. This is the primary reason why we have a lot of table-related libraries available.
One such great component for Angular is the Table component from Angular Material. It's a very solid table component that can be used without any hassle and is well documented.
Features commonly seen
The most common features that can be seen in any table component are:
- Sorting
- Filtering
- Pagination etc
Implementing these from scratch could take time and If you don't know what you are doing, can lead to performance issues when dealing with huge data. In this article, I will be only focusing on managing the data for the table in a nice way and how to implement sorting in the table with the help of directives.
Creating the Data Source
This approach is seen in the Angular Material table where we have the concept of Data Source. Here is what the official doc says:
The DataSource is meant to serve as a place to encapsulate any sorting, filtering, pagination, and data retrieval logic specific to the application.
The data source will be the "one place" where we will segregate all the logic related to the table. In this way, our component will not be polluted. Also, another benefit that we get is that the common functionalities can be shared.
We are going to try and build something similar to the Material DataSource. The whole point of the post is to show you that you could do things this way too. It's like a starting point for someone who would like to explore more on this stuff.
Creating an abstract class
First, we start by creating a simple abstract class that implements some of the basic stuff that we need for the table to work.
export abstract class DataSource<T> {
  private subs = new SubSink();

  private dataSubject = new Subject<T[]>();
  // The exposed observable for the table  to user
  data$ = this.dataSubject.asObservable();

  constructor(data: T[] = []) {
    this.updateData(data);
  }

  destory() {
    this.subs.unsubscribe();
  }

  /**
   * The data which drives the table. It will accept
   * either array or an observable.
   * @param data - data for the table
   */
  updateData(data: T[] | Observable<T[]>) {
    if (isObservable(data)) {
      const sub = data
        .pipe(
          tap((res) => {
            this.dataSubject.next(res);
          })
        )
        .subscribe();
      this.subs.add(sub);
    } else {
      this.dataSubject.next(data);
    }
  }
}
Let me break down the code a bit.
The class DataSource<T> accepts a generic type that can be provided to have proper typing for the data.
subsink is a tiny little library that can help you manage your subscriptions with ease. You can initialize it and add subscriptions to it subs.add(subscription) and then do
subs.unsubscribe() to unsubscribe from all of the subscriptions.
Check it out here: npm | github
Firstly, Initialize a subject that will be used for pushing the data out of the data source. The data$ observable is what our table will be relying on.
The constructor takes an initial value for the data source which is not mandatory.
The destory method does the cleanup of subscriptions and should be called in the table component's ngOnDestroy method.
The updateData method accepts either an array or an observable just for some flexibility. This function can be used to update the data in the data source. Say if you are getting data from an API call in the component, you can call this method and pass the data to the data source.
Using it in the component
Now that we have our basic data source ready, we can see how it can be used inside a component.
Once the component is created, In my case User component, the first thing we have to do is to create a dedicated data source for the User component. I call it the UserDataSoruce. We just have to create a class and extend our base DataSoruce.
export class UserDataSoruce extends DataSource<User> {}
For now, this is all we need. Once we start implementing the sorting functionality, more things will be added to the data source.
Setting up the component
@Component({
  selector: "app-user",
  templateUrl: "./user.component.html",
  styleUrls: ["./user.component.css"],
  changeDetection: ChangeDetectionStrategy.OnPush
})
export class UserComponent implements OnInit, AfterViewInit, OnDestroy {
  userDataSoruce = new UserDataSoruce([]); // Create the instance of datasoruce
  users$: Observable<User[]> = this.userDataSoruce.data$; // observable used by table

  constructor(private userService: UserService) {}

  ngOnInit() {
    const users$ = this.userService.getUsers().pipe(pluck("data"));
    this.userDataSoruce.updateData(users$);
  }

  trackBy(_: number, user: User) {
    return user.email;
  }

  ngOnDestroy() {
    this.userDataSoruce.destory();
  }
}
The interesting parts of the code above is creating the instance of our UserDataSoruce class. And in the ngOnInit we get the user data from the API and is
and the template file:
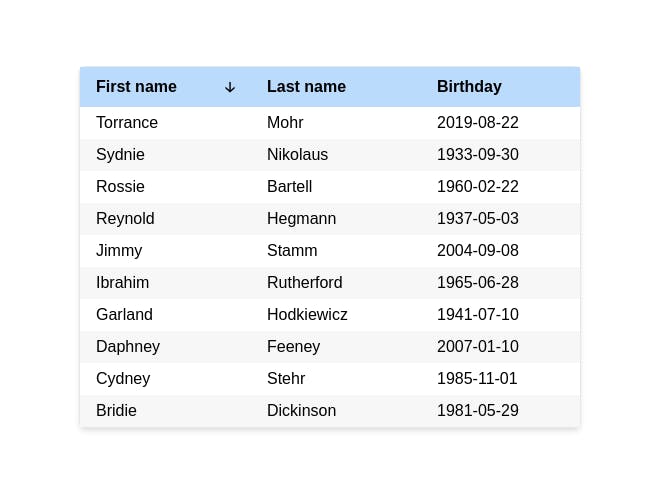
<div>
  <table>
    <thead>
      <tr>
        <th>First name</th>
        <th>Last name</th>
        <th>Birthday</th>
      </tr>
    </thead>
    <tbody>
      <tr*ngFor="let user of users$ | async;trackBy:trackBy">
        <td>{{user?.firstname}}</td>
        <td>{{user?.lastname}}</td>
        <td>{{user?.birthday}}</td>
      </tr>
    </tbody>
  </table>
</div>
Our table should be up and running by now. This would seem overly complicated for just showing some data in a table. Yes, it does! But once we start to implement sorting and other features, it will be clear why this would be a better approach.
Implementing Sorting
Now that we have the table and the data source setup, it's time to implement sorting. How would you normally implement sorting? Will all the logic for sorting be added inside your component?
In this approach, we are going to abstract away almost all of the logic related to sorting into our data source and by using directives.
So what we are trying to implement:
- user should be able to sort the column in ascending or descending order
user will be seeing the default sort data on clicking 3 times:
Default --> Ascending --> Descending --> Default- user will be shown arrows to mark the current sort direction
The approach that we are going to take is very similar to what is seen in the Angular Material Sort component. You will be able to understand some of the inner workings of it.
Creating the necessary directives
Our directives will be taking care of all the above points. We don't have to maintain any kind of state inside our component, making the component clean.
We will be needing two directives (one is actually gonna be a component):
- Main Sorter Directive
- Sort Header Component
Main Sorter Directive
This should be placed on the table tag and acts as our main parent.
@Directive({
  selector: "[sorter]" // <-- selector
})
export class Sorter {
  active = null;
  direction = null;

  @Output() sortChange = new EventEmitter<SortChangeEvent>();

  sort(column: string) {
    let direction = this.direction;
    // If column is not the same as active, reset the direction
    if (this.active !== column) {
      this.direction = null;
      this.active = column;
    }
    // Default --> Ascending
    if (this.direction === null) {
      direction = "asc";
    }
    // Ascending --> Descending
    else if (this.direction === "asc") {
      direction = "desc";
    }
    // Descending --> Default
    else if (this.direction === "desc") {
      direction = null;
    }
    // Emit the current active column and the direction
    this.sortChange.emit({
      column,
      direction
    });
    this.direction = direction;
  }
}
There are two variables for managing the currently active column and the direction of sort. Then we have an event that will be emitted when the user clicks on the sort header.
sort function takes the column id to sort as the input. It just modifies the state according to the column being sorted and the prev state.
Sort Header component
So we are using a component here as we need to show the arrow mark based on the sort direction.
@Component({
  selector: "[sortHeader]",
  template: `
    <div class="sort-col">
      <ng-content></ng-content>
      <div ngClass]="{
          arrow: true,
          hide: sorter?.active !== ref || sorter?.direction === null,
          asc: sorter?.active === ref && sorter?.direction === 'asc',
          desc: sorter?.active === ref && sorter?.direction === 'desc'
        }">🡡</div>
    </div>
  `,
  styles: [] // <-- check the source code for styles
})
export class SortHeader {
  @Input() ref: string; // <-- unique key for the column

  @HostListener("click")
  sort() {
    this.sorter.sort(this.ref); // <-- call the sort function in the parent
  }
  constructor(private sorter: Sorter) {} // <-- Inject the parent directive
}
The interesting part of the above code is:
constructor(private sorter: Sorter) {}
We are injecting our parent directive in the header component. Angular's DI system will then provide us with access to the parent sorter where we have written our sort function. Read more: angular.io/guide/hierarchical-dependency-in...
Now that we have our sort related directives ready, this is how we update the template code:
<div>
  <table sorter>
    <thead>
      <tr>
        <th ref="firstname" sortHeader>First name</th>
        <th ref="lastname" sortHeader>Last name</th>
        <th ref="birthday" sortHeader>Birthday</th>
      </tr>
    </thead>
    <tbody>
      <tr *ngFor="let user of users$ | async;trackBy:trackBy">
        <td>{{user?.firstname}}</td>
        <td>{{user?.lastname}}</td>
        <td>{{user?.birthday}}</td>
      </tr>
    </tbody>
  </table>
</div>
See that we have added the sorter selector to our <table> tag and
sortHeader to our <th> along with the unique key for that column ref.
You can simple listen to the output and handle the change in your component like this:
<table sorter (sortChange)="handleSort($event)">
</table>
But we will be doing something even better.
Updating DataSource to accommodate sorting feature
We are going to make few changes to our DataSoruce abstract class and add some for stuff so we can handle sorting.
export abstract class DataSource<T> {
  private subs = new SubSink();

  // to save the initial sort order
  private inititalDataSubject = new Subject<T[]>();
  initialData$ = this.inititalDataSubject.asObservable();

  private dataSubject = new Subject<T[]>();
  // The exposed observable for the table  to user
  data$ = this.dataSubject.asObservable();

  constructor(data: T[] = []) {
    this.updateData(data);
  }

  /**
   * Register the sorter with the datasource
   */
  set sorter(sorter: Sorter) {
    this.listenToSortChanges(sorter);
  }

  destory() {
    this.subs.unsubscribe();
  }

  updateData(data: T[] | Observable<T[]>) {
    if (isObservable(data)) {
      const sub = data
        .pipe(
          tap((res) => {
            this.dataSubject.next(res);
            this.inititalDataSubject.next(res);
          })
        )
        .subscribe();
      this.subs.add(sub);
    } else {
      this.dataSubject.next(data);
    }
  }

  abstract sortLogic(sorter: SortChangeEvent, data: T[]): T[];

  /**
   * Update the data when the user sorts
   * @param sorter - sorter instance
   */
  private listenToSortChanges(sorter: Sorter) {
    const sub = sorter.sortChange
      .pipe(
        withLatestFrom(this.initialData$), // <-- get the data
        map(([sortEvent, data]) => this.sortLogic(sortEvent, data)),
        catchError(()=>of([]))
      )
      .subscribe((data) => this.dataSubject.next(data));
    this.subs.add(sub);
  }
}
Here are the changes we made:
- Add an abstract method
sortLogicwhich gets the sort change event and the data. It should return an array. - Add a setter to register our
Sorterwith data source What it does is that it listens to the sort change events and calls thesortLogicmethod which should be implemented by ourUserDataSource.
Updating UserDataSource
Now we have to implement the sortLogic method in our UserDataSource:
export class UserDataSoruce extends DataSource<User> {
  sortLogic({ column, direction }: SortChangeEvent, data: User[]) {
    let sorted = data;
    if (direction === null) {
      return sorted;
    }
    switch (column) {
      case "birthday": // <-- can provide custom sorting logic if needed
        sorted = [...data].sort((a, b) => {
          const order = direction === "asc" ? 1 : -1;
          if (new Date(a[column]) > new Date(b[column])) {
            return order;
          }
          return order * -1;
        });
        return sorted;
      default:
        sorted = [...data].sort((a, b) => {
          const order = direction === "asc" ? 1 : -1;
          if (a[column] > b[column]) {
            return order;
          }
          return order * -1;
        });
        return sorted;
    }
  }
}
So the method sortLogic receives the SortChangeEvent and the table data as params. We can use this info to sort the data and return it. If a particular column needs custom sorting, that can be handled here as well.
Updates to UserComponent
Our component would look like this:
export class UserComponent implements OnInit, AfterViewInit, OnDestroy {
  userDataSoruce = new UserDataSoruce([]);
  users$: Observable<User[]> = this.userDataSoruce.data$;

  @ViewChild(Sorter) sorter: Sorter; // <-- get the sorter instance

  constructor(private userService: UserService) {}

  ngOnInit() {
    const users$ = this.userService.getUsers().pipe(pluck("data"));
    this.userDataSoruce.updateData(users$);
  }

  ngAfterViewInit() {
    this.userDataSoruce.sorter = this.sorter; // <-- register it with data source
  }

  trackBy(_: number, user: User) {
    return user.email;
  }

  ngOnDestroy() {
    this.userDataSoruce.destory();
  }
}
We get hold of the Sorter instance using ViewChild ( ref ) and then register it with the data source in the ngAfterViewInit lifecycle hook.
We are done with the sorting implementation. Now that table should be sorted when the user clicks on the header.
Final Thoughts
I wanted to write about things like these which are not seen very commonly, we use libraries and never actually try to see how they are implemented. So I just wanted to open up the minds of those who haven't actually understood how powerful Angular can be.
This won't be a perfect implementation, we can bring in a lot of optimizations to the code. We can extend this to include more functionalities like pagination, filtering, searching, etc. If you would like for me to write a continuation post, please do comment down below.
Demo
🌎 Connect with me

Do add your thoughts in the comments section. Stay Safe ❤️